How To Use Stitch Markers in Amigurumi
If you’ve ever lost your place while crocheting in a spiral, or discovered that you must have made a mistake many rounds earlier, I highly recommend you use a stitch marker to mark the start of every round while you crochet your amigurumi! But how do you go about doing that? How does it help you avoid mistakes, and what do you do if you realise you’ve made one?
Or, if your pattern directs you to mark a specific stitch while you crochet, how exactly do you do that?
In the video below, I’ll walk you through everything you need to know about using a stitch marker with amigurumi (or any other crochet worked in a continuous spiral), including:
- How to mark the first stitch of the round
- How to fix a mistake
- How to mark a specific stitch
(And keep reading after the video for text-based instructions and more info on stitch markers for crochet.)
Video Tutorial (right-handed)
Video Tutorial (left-handed)
Note: The videos may look a little small embedded in the blog: if so, you can fullscreen them or click through to YouTube (links: right-handed; left-handed) to watch them full-sized 🙂
Types of Stitch Marker
The ring-shaped stitch markers used by knitters are no good for crochet, as there’s no way to remove the marker from the stitch without cutting it off! Stitch markers for crochet need an opening so they can be slipped off the stitch when you have finished with them. I recommend locking stitch markers, which you should be able to find from any yarn/craft shop:
PlanetJune locking stitch markers are a great choice!
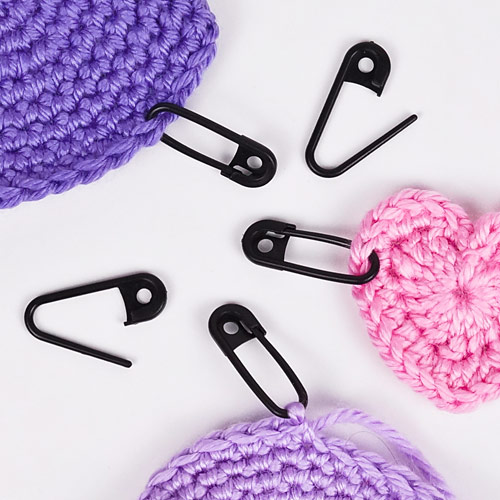
You can also use a coilless safety pin, but the point of the pin is so sharp that it’s easy to split the yarn by mistake, so I do recommend investing in a set of plastic stitch markers. But, in a pinch, you can even use a scrap of yarn as a marker.
Why Use a Stitch Marker?
Stitch markers have three main uses in crochet, and I’ll cover all of them today:
- To hold the working loop between crochet sessions
- To mark the start of your round
- To mark a specific point in a pattern
Holding your Working Loop
The loop on your hook is called the ‘working loop’. When you put your crochet down, you run the risk of your hook falling out, which would allow your work to unravel! To prevent this, remove your hook at the end of each session and place a locking stitch marker in the working loop. Lock the marker and pull the yarn coming from the ball to draw the working loop down around the marker.
When you’re ready to start crocheting again, pull on the marker to draw the working loop back to a useable size. Remove the marker, reinsert your hook, tighten the working loop around your hook, and you’re ready to resume crocheting!
Marking the Start of a Round
As most amigurumi are worked in a continuous spiral, there’s no seam to provide a visual cue to the position of the end of each round, so it’s easy to lose your place and make too many or too few stitches in a round.
Use a stitch marker to mark the beginning of each round. Move the marker up each time you start a new round. If you reach the end of the round before you get back around to the marker, or overshoot the marker, you know you’ve made a mistake in that round.
Note: There’s no need to lock and unlock the marker with each round – unless you’re putting your work down for a while, save time by keeping this marker unlocked as you crochet.
Marking a Specific Point in a Pattern
Some patterns will include specific stitches marked with additional markers, to aid in positioning eyes or assembling the pieces, or as a guideline for which side is which on an asymmetrically-shaped piece.
How to Use a Stitch Marker
The question I get most often is how exactly to mark a stitch – where do you insert the marker?
When you complete a stitch, the loops you’ll work back into in the next round lie just behind your crochet hook, and that’s the place you need to mark.
To mark a stitch:
- Complete the stitch.
- Look at the V at the top of the stitch just behind your hook.
- Insert the marker through both these loops.
(See the video above to watch this in action.)
How to Work Over a Marker
While you’ll remove your ‘start of round’ marker when you get to the next round, markers that are used as indicators stay attached to your crochet until it’s time to use them as an assembly/positioning aid (as explained in your pattern).
To work over a marker:
- Pull the marker to the left (LH: right) and crochet into the marked stitch as usual.
- Pull the marker to the right (LH: left) to get it out of the way as you crochet into the next stitch.
(See the video above to watch this in action.)
When you look at the marker, you’ll see the front edge sits just above the marked stitch (and the back edge sits higher up), so the stitch you’ve marked is just below the front edge of the marker.

Loved this tutorial? I have so many more amigurumi tips and tricks to share with you!
Boost your amigurumi skills with my latest book, The Essential Guide to Amigurumi, your comprehensive guide to amigurumi techniques and tips.
Do you find my tutorials helpful? If so, please consider making a contribution towards my time so I can continue to create clear and concise tutorials for you:
Thank you so much for your support! Now click below for loads more crochet video and photo tutorials (and do let me know what else you’d like me to cover in future tutorials…)


Anna Paradox said
This was so helpful! I’m pretty sure I was not getting it right on a previous project, and my counts kept coming out wrong. Very frustrating! Now that I’ve seen it in this much detail, I’m taking the marker out at the right time and putting it back into the right place, and like magic, I am having a lot fewer wrong counts. Whew.
Monika Bauer said
Hi June
I am new to Amigurumi and I noticed while I was completeing the round, the start was moving to my right and my ‘seam’ was spiralling. It felt like I wasn’t really completing a round even though I worked to my marker. Being a knitter I am not use to my beinging of the round doing this…. am I doing something wrong?
June said
Monika, you’re right that crochet stitches bias when crocheted in the round – it’s the nature of crochet.
Ellen Preston said
Hello June,
Thank you for this tutorial, it was very helpful to know that I have been marking my work correctly. I love your patterns and work.
Have a lovely day, from Western Australia. ??
June said
Thanks Ellen, I’m glad you enjoyed it!