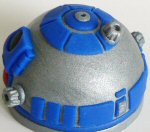
Archive for Polymer Clay

5 minute* project: egg stand

Disclaimer: this is the easiest project ever, and I feel like a cheat even calling it a project! But I’m sure some people will find it useful, so here goes…

I bought a carved soapstone egg while in England, but I want to stand it up for display purposes, and of course it won’t stand without assistance. FIMO to the rescue…

polymer clay egg stand

Take a blob of polymer clay in a colour that coordinates with your egg. The size depends on the size of your egg - it has to be large enough to support the egg. Play with the clay until it is soft, then roll it into a ball. Place it on your baking surface (I use a ceramic tile, but you could use a cookie sheet with a piece of aluminium/aluminum foil on top).

Push the clay down onto your baking surface so it has a flat base and a flattish top (if you use a hard flat surface to push gently down on the clay, you’ll avoid fingerprints - I don’t bother and just smooth the prints away later with my finger). Now take your egg and centre it upright over the clay, then push it down into the clay to make a deep depression in the top of the clay that is the same size and shape as the base of the egg. Remove the egg from the clay. Gently smooth any uneven patches with your finger. Decorate if desired.

polymer clay egg stand

Do not lift the clay from the baking surface - you want the base of the stand to stay flat. Transfer the baking surface to the oven and bake according to manufacturer’s instructions. When it has cooled, you can pop the clay egg stand off the baking surface if it has stuck - it won’t be baked onto the surface.

Paint, finish, varnish etc, if desired - I left mine plain black so as not to detract from the egg. Place your egg in its stand and admire!

polymer clay egg stand

*5 minutes does not include the baking time, obviously!

Comments

fimo medallions

MCoG DVD

I’m in the UK this week, visiting my family, but that doesn’t mean I’m not making anything…

Mysterious Cities of Gold was one of our favourite TV shows when my sister and I were young, and we still love it now (and it’s finally been released on DVD!)

From the DVD synopsis: In the year 1532, a Spanish orphan named Esteban joins a party of Spaniards in their search for one of The Seven Cities of Gold in the New World, hoping to find his father. They are joined on their quest by Zia, an Incan girl, and Tao, the last descendant of the sunken empire of Hiva.

My sister is going to a costume party as Zia, so she asked me to make her a sun medallion for her costume. I decided to make one for myself at the same time - making two is as easy as one. We went out for supplies (a package of FIMO, gold paint, spray varnish and a leather cord) so I could try to reproduce these medallions from the series:

MCoG medallions

To make them, I rolled out the polymer clay and cut it into a circle shape. With the help of a Google image search, I found a picture of the medallion’s pattern, and printed it at the same size as my circle for reference. I carved the pattern with deep, wide cuts so they would show up in the finished piece, made a hole at the top for the cord, and baked it. After baking. I sanded it lightly to knock off any sharp edges, then painted it with three coats of Venetian Gold paint (making sure the paint got into all the lines of the pattern). I sealed the paint on all sides with spray varnish, and then threaded the cord through when it was all dry. And here’s the finished result:

MCoG medallions

Comments (10)

fimo harvest

Lest you think I only crochet these days, I’ve been working on a commission for some polymer clay fruits and vegetables, and now they are ready to be harvested:

polymer clay fruit and vegetables

Vegetable magnets and berry pins. The magnets are embedded invisibly in the backs of the avocadoes and aubergines so they stick to the fridge as if by magic. The pins are baked into the backs of the berries for strength - no glue involved :)

Oh, and that’s one of my pincushions in the background with most of the berry pins stuck into it - it’s not part of the order!

Comments (5)

spot the fakes!

Sorry for the blog silence - I’ve been busy designing! I have 3 projects currently in the works… more on that soon. For now, to help pass the time, here’s a little game for you:

Four of these stones are beach rocks from Lake Ontario. The other seven are my polymer clay faux granite rocks. Can you tell the genuine articles from the Fimo replicas?

real stones and polymer clay replica stones
Click for the close-up

Just a bit of fun for a Tuesday morning!

Normal programming will resume shortly…

Comments (5)

green beaded necklace

April’s OneHourCraft Challenge is “to make an impossibly gorgeous necklace”, so I got the polymer clay out and started playing.

I used a base of translucent Fimo Soft, with snakes of green and blue running through it. I also added dark greeny-blue micro beads (tiny glass beads with no holes) to the rounded beads, which is why they look darker than the others. I had a bit of a surprise when I baked the beads - they darkened and went from greenish blue to a definite green, but that’s okay:

green beads (fimo polymer clay)

I strung the beads with silver (coloured) spacers and findings. The finished necklace length is 14″ so it’s just longer than a choker and sits around the base of my neck.

green polymer clay beaded necklace
Click for full-size version

Thanks Mia for the inspiration to make a necklace! This was a fun quick craft to try.

Comments (1)

faux granite stones

I made these polymer clay faux granite rocks last week. They were originally intended to be stones for the base of my artificial bonsai, but I decided they weren’t quite right for that project. I just sanded them quickly with my homemade detail sander to get my fingerprints off. (The size of each stone is about 1 or 2cm.)

polymer clay faux granite rocks
Are they real, or are they FIMO? Click the pic to take a closer look…

Comments

wip: fimo sculpture

polymer clay stulpture... in progress!
Can you tell what it is yet? ;)

It’s work-in-progress Friday, so here’s a sneak peek at my latest FIMO sculpture. I should have included something for scale in the photo but, just so you know, it’s just over 3cm in diameter.

I’ve only finished the top part but I’m really pleased with it so far. As a lifetime fan of this movie I’ve always wanted one of these, and hey, why buy when you can make?!

I’m going to set this one aside for a while as I have some January-specific projects to work on (crochet calendar submission and my OneHourCraft bag). Any idea where I can find an extra couple of hours each day so I can actually make all the things I want to?

Oh, and don’t worry - I’ve baked what I’ve done already, so I don’t need to worry about all my hard work getting dusty or squashed (I learned this lesson the hard way). 

Comments (2)

detail sander (ex-toothbrush)

I made a polymer clay egg out of leftover clay of various colours marbled together, and needed a way to sand it smooth after baking. Previously, I hand-sanded the ballon in my pig ornament but it took sooo long and I didn’t really want to repeat the process for my scrap clay egg. I heard that you can make an electric sander from an electric toothbrush, so I thought I’d give it a go. Here are the instructions:

  1. I started with a cheap battery-powered toothbrush (reduced to $1 at WalMart).
  2. Use pliers to remove all the bristles from the brush head. Grab a section of bristles firmly with the pliers and wiggle them from side to side until they pull out.
  3. Repeat until the brush head is bristle-free.
  4. Cut a small square of sandpaper just large enough to cover the face of the brush head.Tips for cutting the sandpaper to size:
    • I wasn’t sure what sandpaper would do to my scissors, so I folded the sandpaper back and forward along the line I wanted to cut, and then it tore easily along that line.
    • Make sure you label the back of every little piece of sandpaper you cut, or you will get into a muddle!

  5. Stick a square of double sided tape to the back of the sandpaper square and attach it to the brush head.
  6. Turn on the toothbrush and get sanding!
  7. If your brush comes with extra heads (mine came with 2 heads), you can attach a different grade of sandpaper to each head. If you do this, remember to mark up each head differently, so you know which is which! Otherwise, you can just pull off each square when you’ve finished with it, and tape a finer grit in its place. I’ve been doing this and it works very well. I have sandpaper in 220, 320, 400 and 600 grits.
  8. When your piece is sanded nicely, you can also make buffing heads by attaching a square of sturdy fabric to the brush head in the same way. I used a piece of thick corduroy.

Here’s my finished egg. It’s really smooth and softly shiny, although I couldn’t capture that well in my photo.

polymer clay egg

Comments (14)

autumn bracelet

October’s whiplash theme is Accessories; a really broad theme with a lot of scope. I have been crocheting a lot recently, so I reluctantly (but only temporarily!) put my crochet hook down and decided to go with a different craft this month.

Autumn has always been my favourite season. My birthday is in October, and I love the colours of autumn. Especially since I moved to Canada, the ‘fall’ colours are something I look forward to every year. I decided to make a bracelet with all my favourite autumn elements, so I’d have a little piece of autumn to keep with me all year round.

I made seven signature beads from FIMO polymer clay: a crisp red apple, a bunch of purple grapes, a deep pink rose, a glossy acorn, a pumpkin, an ear of corn, and a red leaf (for scale, the acorn is exactly 1cm tall).

polymer clay apple bead polymer clay grapes bead polymer clay rose bead
polymer clay acorn bead polymer clay pumpkin bead polymer clay corn bead
polymer clay leaf bead

After baking and varnishing them, I glued a bugle bead through the hole in each polymer clay bead for added strength and to give each bead the same width. I strung them on Stretch Magic bead cord with golden bugle beads to space them out and amber coloured glass beads as accents. Here is the finished bracelet (click to see a bigger version):

FIMO polymer clay autumn themed bracelet

UPDATE: Here’s a photo of the bracelet in use!

polymer clay autumn bracelet

whipup

Comments (4)

polymer clay berry pins

My cubicle at work needs some personality, so I made these berry pins to brighten things up. They are made from FIMO polymer clay, although I did cheat a bit by using a mould. I embedded long pins in the back before baking, and then varnished them with Varathane.

Strawberries, blackberries, raspberries… yum!

polymer clay berry pins - strawberries, blackberries, raspberries 

Comments (3)

« Previous entries