Punchneedle Poinsettia
© June Gilbank 2009
New to Punchneedle Embroidery, or need some tips to improve your skill? My eBook, The Punchneedle Handbook, will teach you everything you need to know, from supplies and basic step-by-step instructions for beginners, to my techniques and troubleshooting tips that will allow absolutely anyone to create beautiful punchneedle embroideries! This poinsettia design would make a perfect beginner’s project.
Here are a few ideas for use, to get you started:
- Attach a felt backing and a pinback to make it into a removable pin
- Attach a felt backing and hanging loop and use it as a tree decoration
- Use washable fabric glue to attach it directly to a table runner or fabric napkin ring
- Use fabric glue to attach it to a bag or purse as a pretty embellishment

This poinsettia pattern is Donationware – the pattern is available for free, but if you like it please consider sending me a donation to show your appreciation:
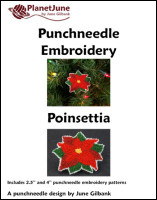
Send me a donation and receive the easy-to-print PDF version of the complete pattern and instructions as a thank you! The PDF version also includes details on how to transfer the pattern, use the lipped embroidery hoop, and a bonus 4″ size poinsettia!
Donations of any size are much appreciated. Just add the amount you wish to donate, and, once you have checked out and paid, your pattern will instantly be available to download from your PlanetJune account.
The complete pattern and instructions are available below, regardless of whether or not you choose to pay for them 🙂
This is a PlanetJune original punchneedle pattern. Feel free to use items made from this pattern however you wish, but I’d appreciate credit as the pattern designer. Please do not reproduce the pattern anywhere else; instead post a link to www.planetjune.com/punchneedlepoinsettia/
Supplies
- Punchneedle (size medium)
- Punchneedle threader
- 4″ Lip-lock embroidery hoop
- 6.5” x 6.5” square of weavers cloth or another suitable backing fabric
- Small, sharp embroidery scissors
- Fine marker pen
- Fabric glue (use washable glue if you may need to launder the embroidery)
- Optional: Felt backing
- Embroidery Floss (see Floss Colours, below)
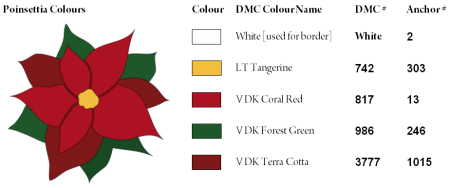
Floss Colours
I use DMC 6-strand embroidery floss in all my designs. Listed below are the exact DMC shades I used together with their closest equivalents in Anchor floss. Feel free to customize the design with your own colour substitutions if desired. You will need less than 1 skein of floss per colour.
Pattern
Right-click and save the pattern image below, and print it. It has been formatted to print at the correct size (2.5″). If you’d like to make a larger poinsettia, send me a donation (see above) to receive the larger design!
Preparation
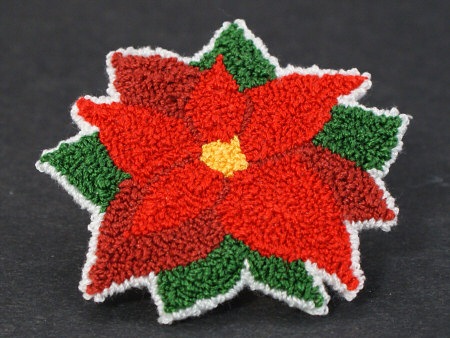
- Print the pattern and transfer the design to the centre of your fabric with the marker pen. (Note that as you will be punching on the reverse side of the fabric, the pattern will be a mirror image of the finished embroidery. The pattern has already been reversed for you; the finished design will look like the front cover image.)
- Hoop the fabric and tighten the hoop as much as possible, pulling the fabric tighter if necessary – the fabric should be drum-tight.
- This pattern is worked with 3 strands of embroidery floss throughout, so for each length of 6-strand floss you cut, split it into two lengths of 3 strands each. Cut lengths of 1-1.5m (3.5-5‘) long.
- If your punchneedle has an adjustable loop length, set it to the minimum length.
Punch
Punch technique: Punch around the edge of each area with the appropriate colour, staying inside the lines – do not punch along the lines. Fill in the area by working in a spiral fashion towards the middle of the area.
Punching order: The following are my suggestions for specific punching order, and punching tips where necessary. There is no required punching order, so if a different order feels more natural to you, feel free to follow that instead!
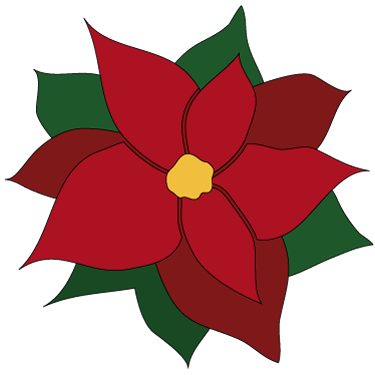
Note: The fine black lines in the image above show the outlines of the pattern – do not punch a line of black stitches along these lines!
- Punch the yellow centre of the poinsettia.
- Punch the darker red lines radiating out from the centre. As the lines are very fine (1 row of stitches), punch your stitches very close together so you’ll form a complete line of loops with no gaps.
- Outline and fill in the five bright red leaves.
- Outline and fill in the three dark red leaves.
- Outline and fill in the five green leaves.
- To help the loops at the outer edges stay in position, I like to punch a single row of white stitches all around the edge of the design. This way, the white loops will support the coloured loops and keep them upright. Punch your stitches very close together.TIP: If you find that you are catching a lot of your existing stitches as you punch the border, you can ease them back into position with the tip of the punchneedle later. To prevent this from happening, leave a little more space between the existing stitches and the line of the border, and/or tip the punchneedle slightly so the needle punches outwards (instead of vertically), so it won’t punch through the existing loops.

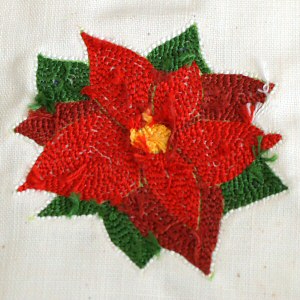
The finished design, before trimming away the excess fabric
The back of the finished design
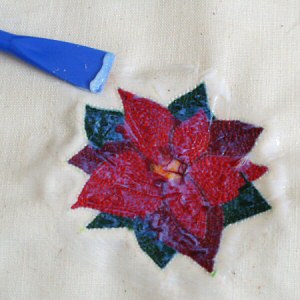
To anchor the threads and prevent the fabric from fraying when you trim it away, apply a thin layer of washable fabric glue to the reverse side of the embroidery, extending to about ¼” beyond the edge of the design.
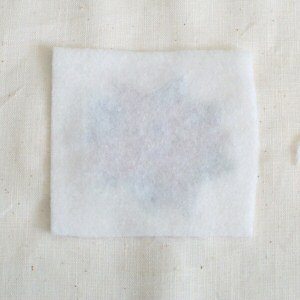
If you want a felt backing, you can either apply it immediately while the glue is still wet, as shown here, or add it later after trimming the design. (Applying it now means you only have to cut it out once, but cutting through both fabric and felt at once without cutting through any of the embroidered loops is trickier.)
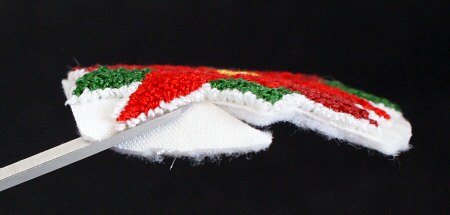
When the glue is completely dry, use small, sharp scissors to clip the excess backing fabric away close to the edge of the embroidery (taking care not to clip into the loops). Leave a couple of threads of the fabric beyond the design when you trim it, so the edge loops are still anchored by the fabric. The border loops will naturally lean out to the sides and hide the remaining fabric.
Happy Christmas! I hope you enjoy this pattern. Please leave me a comment below if you do, and consider leaving me a donation. Thanks!
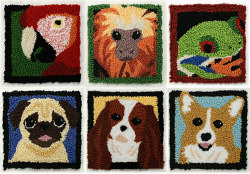
If you like this pattern, take a look at my other Punchneedle Embroidery patterns and my eBook, The Punchneedle Handbook!


NANCY G. ELLISON said
CAN YOU PLEASE TELL ME WHERE I CAN GET A WOODEN GRIPPER FRAME INSTEAD OF A HOOP? ONE THAT IS LARGE BUT NOT HUGE. THANK YOU, NANCY G. ELLISON
bev beckham said
hi june, new to the computer, new to punchneedle, and old to crocheting. i bought a bunch of punchneedle supplies at a yard sale, and someone says i got a steal, as the bobbins alone are worth a thousand bucks!! i got no idea of how to start, and wondering if i have all the needle parts. i cant get the stitch to stay in the fabric,and about ready to sell the whole works to anyone interested. i loved ur rose pattern(crocheting) and would love to make it into a motif for an afghan. got any ideas? i like the 3d look of the rose as i have searched many hours for a pattern for an afghan that came out in a womans mag. in the late seventies and eighties.i love ur website, i make many afghans, for the needy, and love simple and fast patterns thanks bb
June said
Hi Bev,
1: Punchneedle. Try looking at my free basic punchneedle tutorial – you’re probably holding the punchneedle wrongly if the loops are pulling out. And/or you can buy my ebook, The Punchneedle Handbook, for more information and instructions.
2: Rose afghan. My rose design isn’t really suited to be made into an afghan, because of the rolled-up design. You’d do better to find a pattern for an afghan square containing a rose that is worked in the round, for example there are several pretty designs available in the Roses category on Crochet Pattern Central.
Hope that helps!
June
edie said
When you say, ‘medium punchneedle,’ how do you tell if it’s medium? I have a Clover product with only one needle, and I have no idea what size it is. I have a Boye set with four needles, and there is a substantial size difference between them.
Any suggestions?
Edie
June said
Edie, I know it’s confusing – the different brands really don’t make this clear! I spent a lot of time looking into this, because I was confused, and here’s what I found. The punchneedle sizes are as follows:
EXTRA SMALL (1 strand of floss)
SMALL (2 strands of floss) is 1.2mm
MEDIUM (3 strands of floss) is 1.6mm
LARGE (6 strands of floss) is 2.2mm
EXTRA LARGE (used with rug yarn or ribbon)
In general:
If a punchneedle comes with one one needle tip, it will be MEDIUM unless otherwise marked.
Three needle tips will be SMALL, MEDIUM and LARGE.
Four needle tips will also include the EXTRA SMALL (the rug punch is a separate tool and will never be included in a set with the other sizes)
Mystery solved! (I’ll also add this info to my Punchneedles page in case anyone else is also confused!)
edie said
So when you say ‘1.6 mm’ are you measuring the vertical opening of the needle? the diameter of the shaft? something else entirely?
And, would you offer any insight into types of fabric to use with different needles? Also, how tight should it be in the hoop, and ways to make that happen. I’ve spent hours on this, and I’m starting to get cranky.
Thank you!
Edie
June said
1.6mm would be the width of the shaft of the needle. If you have more punchneedle questions, you may wish to consider buying my eBook, The Punchneedle Handbook – it should answer all your questions, and has a troubleshooting section to solve the problems commonly experienced by new punchneedlers. Don’t be discouraged! Punchneedle is really simple and fun once you’ve mastered the basics 🙂
edie said
I already have your book. How do you determine what weight of fabric, needle, and floss to use together? I got quarters of 5 weights of fabric, and have tried each with all my needles and each needle with a variety of threads. No success so far. I’m feeling ridiculous.
June said
Hmm, okay, let’s see if we can figure this out. The strands of floss I gave in my previous comment will tell you how many strands to use with each needle.
As for the fabric, there are 2 factors at play:
Hopefully knowing these two factors will let you figure out what’s been going wrong for you and how to correct it. Without knowing more specifics, I can’t really offer much more advice, except that if you’re having problems with your fabric, look at the instructions for interfacing on p5 of the book – that should let you successfully punch onto almost any fabric.
Good luck!
Ellen said
Wow, everything comes back again – my mom taught me how to do punchneedle back in the early 1960’s.
Rose said
What is punch needle and how does it work? I am very intrigued.
June said
Check out my links above – I have a Punchneedle ebook (The Punchneedle Handbook) for sale, and a free basic tutorial that should give you an idea of what punchneedle embroidery is all about 🙂
Dentists Torrance said
Wow, that’s a very wonderful idea you can prepare for the next Christmas season. Thank you for sharing your talents in crafts!
susan armstrong said
the poinsettia pattern is so great just what i was liking for