As promised, here are the instructions to make my roll-up crochet hook case. Click the images for larger versions.
- First, you need to figure out how big you want your case to be. I drew the figure below to design my case.
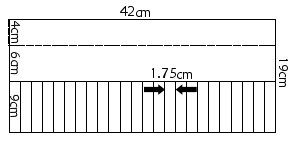
Here are my calculations, in case you want to vary the size: - I chose 24 pockets of 1.75cm width each. Finished case width = 24*1.75 = 42cm
- My tallest hook is 15cm tall, so I added 4cm to the height of the case to make the top flap so the hooks don’t fall out. Finished case height = 15+4 = 19cm
- My pockets are 9cm tall so the hooks stay in nicely. Pocket height = 9cm
- I added 1cm around each edge for seam allowance.
- Cut your fabric as follows:
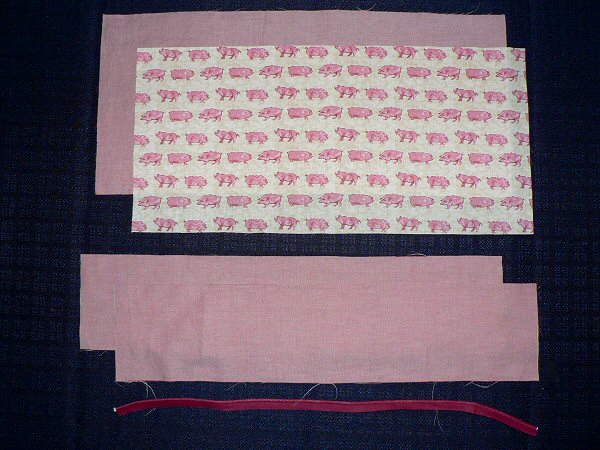
Materials list:
- Outer fabric (pink): 44x21cm
- Lining fabric (pigs): 44x21cm
- Pocket fabric (pink): 2 pieces, each 44x10cm
- Piping trim for top of pocket (red): 44cm
- Piping trim for edge of case (not shown) = 2*(finished width + finished height + overlap) = 2*(42+19+1) – 126cm
- Ribbon or similar to tie the case closed (not shown)
- Place one piece of pocket fabric face up. Pin the pocket trim on top along the length of the pocket, with the raw edges of fabric and trim matching. Sew all the way along, as close to the piping stitching as possible (I used the zipper foot on my sewing machine):

- Pin the other piece of pocket fabric on top, so the pocket has right sides together and the piping is sandwiched between the two. Flip the fabric over and sew along your previous line of stitching.
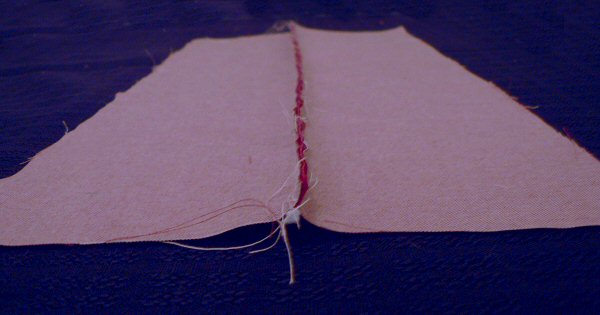
Pocket opened out, right sides down. Note all the raw edges (piping and both pieces of fabric) are together at the top.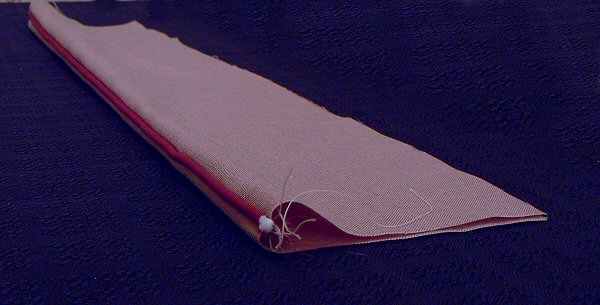
Here’s the pocket fabric with the wrong sides together. The piping now shows on the right side - Lay out the lining fabric right side up. Place the folded pocket on top of the lining so the bottoms of the pieces are aligned. Now open the pocket fabric upwards as shown below and pin the pieces together from the bottom up to the seam in the pocket. Check under the folded up flap of the pocket to make sure the piping is not pinned down! Pin the seams down toward the bottom.
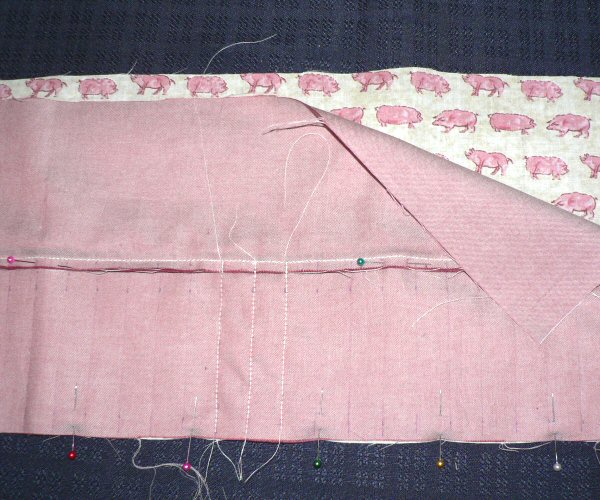
Mark out the lines for the individual pockets using a fabric pen or pencil – remember to add 1cm (the seam allowance) to the pocket at each end. Sew up each line from the bottom of the fabric to the seam as in the picture below.

- Place the the outer fabric right side up. Starting with the end of the piping along the middle of any edge of the fabric, pin the piping around the edge of the fabric, with the raw edges to the outside. Clip the corners of the piping as in the photo below, so the piping can go around the corners.
Sew all around the edge of the piping, leaving a couple of inches free at each end of the piping. Unravel the seam on one end of the piping by 1cm and trim the other end so it slips inside the open end. Fold the raw edge under and finish sewing the piping.
Yes, it looks messy, but the stitching isn’t going to show and the piping join looks good!
The finished piping.
- Lay out the lining+pocket face up (make sure the pocket fabric is flipped down to hide the stitching), then pin the outer+piping to it face down (i.e. right sides together). Flip the piece over, then sew over your previous stitching (from attaching the piping). Sew all around the edge, but remember to leave about 3 inches open so you can turn the case right side out. This will also be the place where the ties are attached, so decide if you want to roll the case from the left like mine (so it will tie on the right of the finished case) or vice versa.

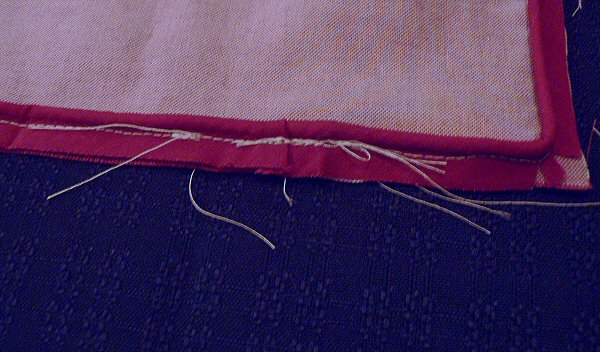
The gap for turning is in the middle of the left side.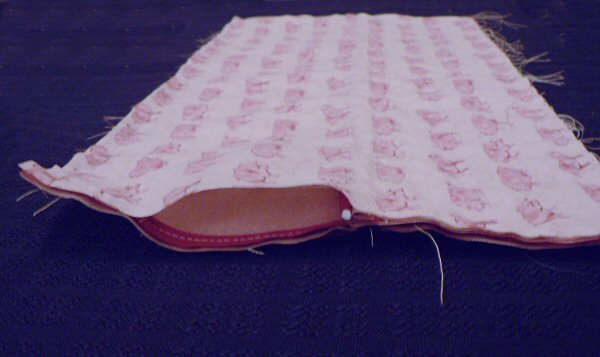
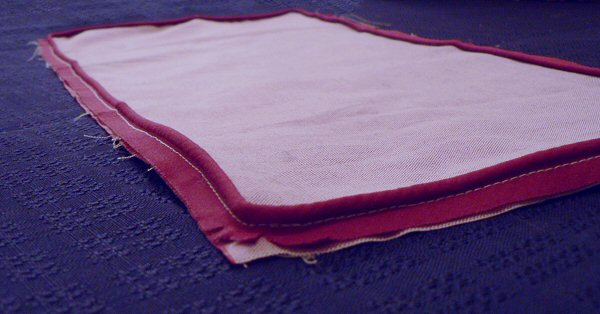
Here’s the gap – all ready to turn… - This is the magic part… Turn the piece right side out through the gap you left:
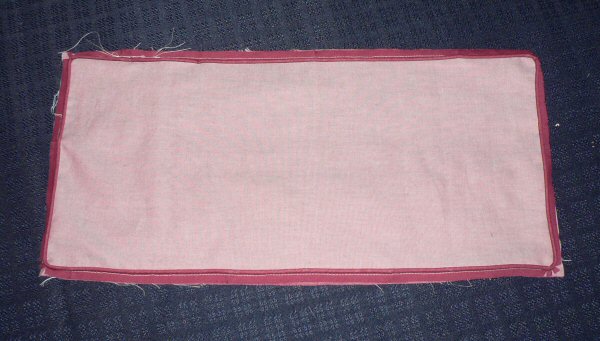
Voila! The gap is on the right side.
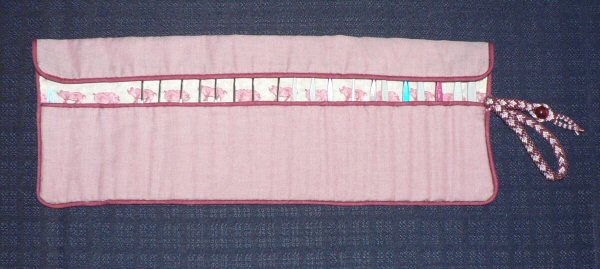
- Now all you need is to attach something to keep the case closed. I went fancy with this one, but the easiest thing to do would be to cut a length of ribbon long enough to wrap around the rolled case and tie closed. Fold the ribbon in half and slip the folded end just inside the gap. Hand-sew the gap closed, trapping the folded end of the ribbon as you go. You will end up with the two long ends of ribbon – wrap them around the case and tie them in a nice bow!
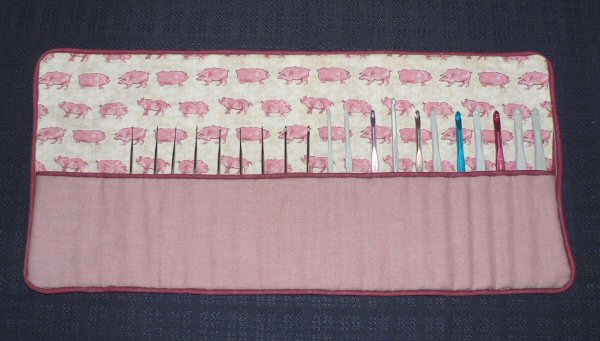
Finished! The top flaps down over the hooks.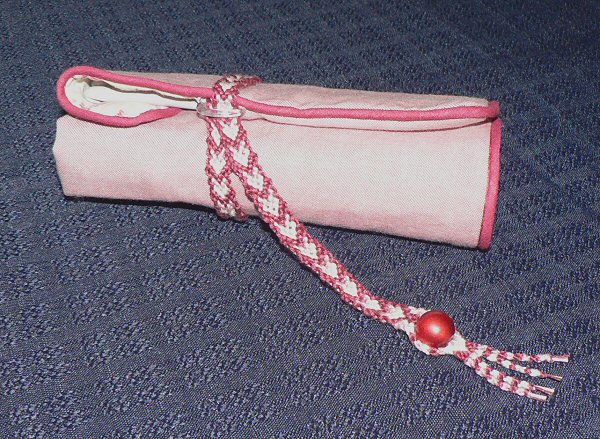
Here’s the case rolled up.

And that’s it! I hope you find this tutorial useful – please let me know if anything is unclear and I’ll modify it. Please also let me know if you make a case – I’d love to see what you come up with! More pictures of my case are available here.


MiMilla said
Thank you for the pattern. I’m going to crochet a case for my Clover Amour hooks. They are awesome! They deserve a really pretty and practical case. Your pattern has the measures needed for my case. I even don’t need to convert from inches to metric.
Martha Knox said
Thank you so much for this pattern. recently purchased a set of hooks and wanted to keep them in something pretty. So happy with my case.
Mo said
I would want to add in a pocket for my scissors, as well. It would keep them handy and close by. 🙂
Karen (Foxtrot400) said
dang, I forgot you had this pattern. I had a customer today looking to make pencil rolls like this, but said she couldn’t find any info on-line and I didn’t have any patterns she liked in-store. I gave her some better search terms to try, but had I remembered this one, before now, I would have sent her directly to you. Here’s hoping she stumbles across it.
Monica said
Amazing! Your instructions are simple and easy to follow! Just like your crochet patterns!!! I had so much fun making myself one, plus a few more for gifts!!! Thank you so much for sharing such a great tutorial! Thanks June!
Kelsey @ Crafty Camo Lover said
Hi there! Thanks for this awesome tutorial! I used it and posted about it on my blog here: craftycamolover.blogspot.com/2011/07/lovely-set-for-knittercrocheter.html
Thanks again!
Nenny said
Hi, awesome tutorial 🙂 thanx for sharing…
Crysta said
Thanks for a fantastic tutorial – I just made this for a gal for a craft swap, and I think she’s going to love it.
Sally said
Thanks for the great tutorial. I made 1 this week. Tweaked it a little and loved how it turned out.
Visit me at bagncraft.blogspot.com/search/label/sewing to view it.
Once again……thanks!!!!
ipanda said
Thanks a lot for this how to!!!
I found it is very useful.
I did make one follow your steps 🙂
Thanks again
Wendy said
Thanks for this wonderful tutorial! I had no troubles following it, and I love the way my case turned out. You can see it here:
here-be-dragons.livejournal.com/569642.html
Thanks again!
Heather said
Thanks! I’ve been thinking about making one of these for a while now…your instructions are very helpful!!!
Christina said
Thank you for the easy to follow instructions and inspiration. I have knitting rolls made from other materials, one inherited and one I made, but I wanted something different for my hooks and found your instructions. Easy for a not so good sewer like myself to follow, even with my crummy old machine. The link should take you to a picture of the one I made.
Angie said
This is great. I love this and plan to make several for me and fellow crocheters. Good job on the tutorial too. I think even I can master this sewing project. Keep up the good work.
Patty said
Awesome Tutorial !!!!!!
I have found alot of Crochet Hook Cases but their all made with yarn.
I want a cloth one as it will last a long time. Thank you very much for this pattern.
I will make this one as soon as I can. I will send you a picture of it when I’m done with it. If you have an email account i can send it there.
Patty
Michelle said
Great tutorial, I may try to make one of these soon 🙂
— Michelle
M A Chute said
Plan to make one this week for a Christmas Gift. Thanks so much for the great directions.