This tutorial is Donationware – the instructions are available for free, but if you like it please consider sending me a donation to show your appreciation:
Send me a donation and receive the easy-to-print PDF version of the tutorial as a thank you!
Donations of any size are much appreciated. Just add the amount you wish to donate, and, once you have checked out and paid, your PDF will instantly be available to download from your PlanetJune account.
The complete instructions are available below, regardless of whether or not you choose to pay for them 🙂
This is a PlanetJune original tutorial. Please do not share or reproduce this tutorial; instead post a link to www.planetjune.com/pincushion
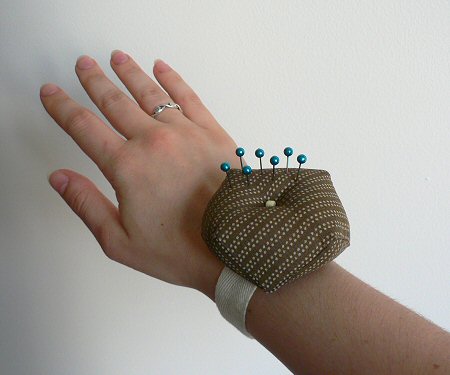
I designed my pig wrist pincushion last summer, and it’s been so useful – I wear it whenever I use my sewing machine. This month’s Whiplash challenge theme is Zakka so I thought a tutorial for my pincushion might fit into that category. I have named this pincushion the Offset Square Wrist Pincushion because it’s made from two squares of fabric, offset before sewing, which results in an interesting shape in the finished pincushion:
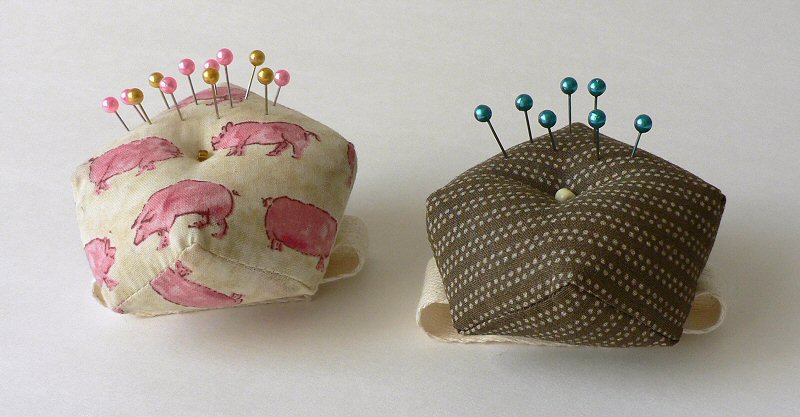
Click for the full size picture
You will need:
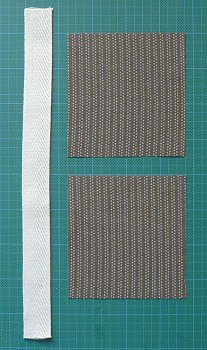
2 squares of fabric, each 3.5″
3/4″ width twill tape, approx 10-12″ (depending on the size of your wrist)
3/4″ width Velcro, 1.5″
A small bead or button
Sewing thread in colours to match fabric and Velcro
A small quantity of polyester fibrefill stuffing
Instructions
- Measure the circumference of your wrist and add 3.5″. Cut a length of twill tape to this measurement.
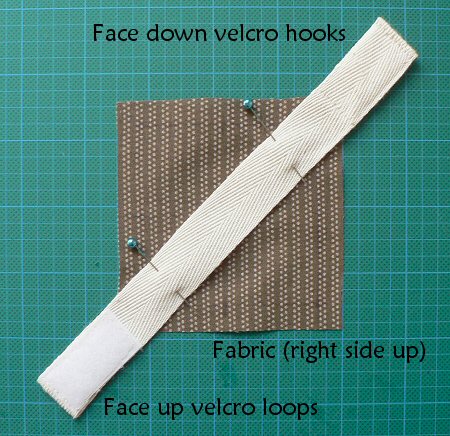
- Lay the twill tape down on a flat surface, and fold up 1 inch at one end of the tape. Position the ‘hook’ piece of the Velcro at the same end so it covers the raw edge of the folded tape. Pin in place if required, then sew all around the edge of the Velcro.

- Turn the twill tape over so the Velcro is face down. Fold up 1 inch at the other end of the tape and position the ‘loop’ piece of the Velcro over this end so it covers the raw edge of the folded tape. Pin in place if required, then sew all around the edge of the Velcro.
- Cut two 3.5″ squares of fabric using scissors or a rotary cutter. Using a fast-fade fabric pen or tailor’s chalk, mark one square (square A) 3/8″ from the edge around all four edges, then mark the centre of each edge. Mark the second square (square B) with registration points 3/8″ down from the top, at each side.

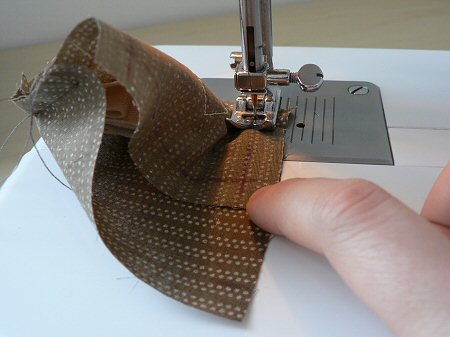
- Position A face up and lay the twill tape along a diagonal of the fabric with the loop side of the Velcro facing up, so that an equal amount of the tape extends over each corner of the fabric. Pin the tape to the fabric.
- Sew the tape to the fabric with a 1.5″ long rectangle in the middle of the fabric and tape (turned over in photo below so you can see the stitching).
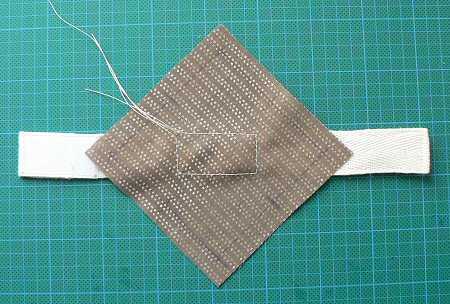
-
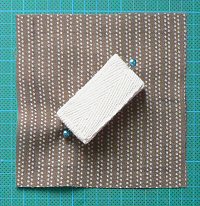
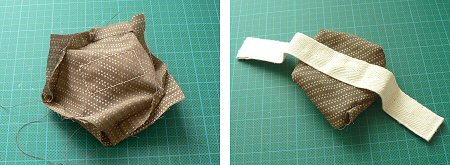
Place B face up with the registration marks at the top edge. Close the wrist strap and pin to itself to keep it out of the way while you sew up the pincushion (see right), then place A face down on top of B. Now offset A by moving it upward until A’s centre marks are aligned with B’s registration marks. Pin the squares together along the right hand side.
Now, to sew the squares together. You will be stitching 7 lines, each half the length of one side of the square, and then rotating either the upper or lower fabric square before stitching the next line. The fabric you have already sewn will get bunched up while you are sewing, but it will all work out in the end!
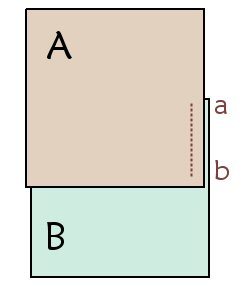
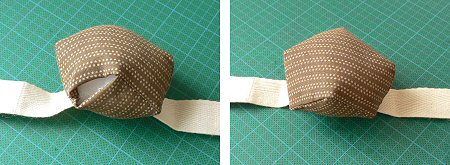
- Starting at the centre of the right edge of A (point a), sew the squares together from a to b. Make sure the sewing machine needle is down, then lift the presser foot. Rotate A so that the next side of A is aligned with the remainder of the first side of B and point c is directly over point d. Pin in place if desired (as the piece is so small, I find it easier to just hold the two pieces together and feed them through the machine), then lower the presser foot.
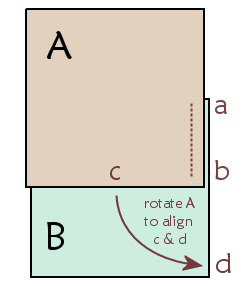
- Sew along this edge until you reach point d. Make sure the sewing machine needle is down before raising the presser foot. Rotate B so the next side is aligned with the remainder of the side of A. Pin if desired, lower the presser foot, then sew along the next edge.
- Continue in this way, repeating 8 and 9, until you reach the final side. Leave this side open to turn the pincushion through. Finish off securely.
- Clip the excess fabric from all the corners of the pincushion, then turn it right side out through the open side. It will be a tight fit so be patient with it. You can use a pen or your finger to push out the corners.
- Fill the pincushion with fibrefill until it is fairly solid, then fold the seam allowances inside the cushion and hand-stitch the gap closed.
- Thread a needle with both ends of a length of strong sewing thread, leaving the loop of the thread longer than the two ends. Push the needle through the centre of the pincushion from the middle of the cushion top through to the middle of the tape. Do not pull the thread all the way through – leave the loop extending from the top. Insert the needle close to where it came out and stitch back up through the pincushion and through the loop. Pull tight to dimple the centre of the cushion.
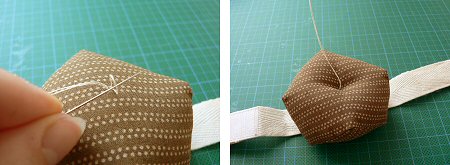
- Add a small button or bead to cover your stitch and then go back through the pincushion, make one more small stitch on the back and come back through to the top. Unthread one of the two ends from your needle, go through the button or bead once more with the other end. Tie the two ends together and then lose them inside the pincushion.
- Attach the pincushion to your wrist, add some pins, and you’re ready to go!
I hope you enjoyed this tutorial! Please leave me a comment if you did, and consider leaving me a donation. Thanks!


Leave a Reply