Although I have my new leather desk chair in my craft room, I stored my old chair in the basement, just in case. I saw a great post (‘save your old chair with a new look’) on IKEA Hacker a few weeks ago, and recognised my boring old Svenning chair given a fantastic makeover. Well, I do have two desks in my craft room, so having two chairs wouldn’t be a bad idea…
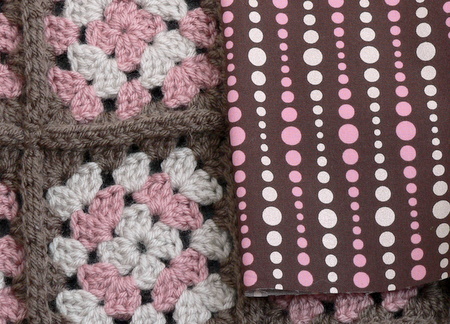
I went to the fabric store and managed to find some fabric in the exact colour scheme I used to crochet the throw for my other chair!
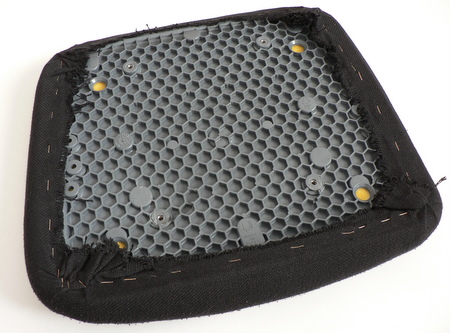
Holly’s method involved removing the old fabric from the chair, and then stapling the new fabric over the chair padding. I don’t have a staple gun, and after reading about Holly’s stapling difficulties, I decided to try a different method to attach the new fabric. I removed the backing fabric from the seat, and the plastic backing from the back rest, but left the original fabric stapled to both parts.
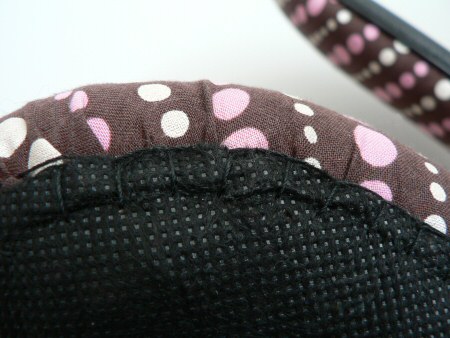
I stretched the new fabric over each piece and pinned it roughly in place so the dots pattern would be straight. Using a curved upholstery needle and strong thread, I stitched around the underside of the seat, sewing the new fabric to the old fabric.
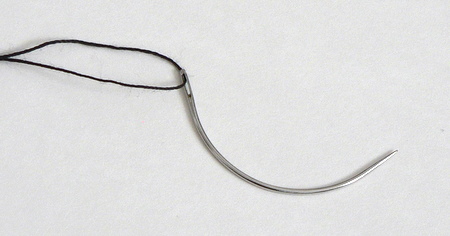
I used a combination of running stitch for speed and backstitches for extra security every few stitches and around the corners. No need to be too neat – none of this is visible in the finished chair.
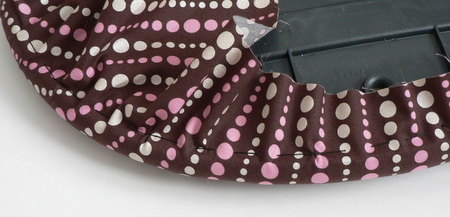
When I’d finished sewing, I trimmed the excess fabric, leaving about an inch beyond my stitches.
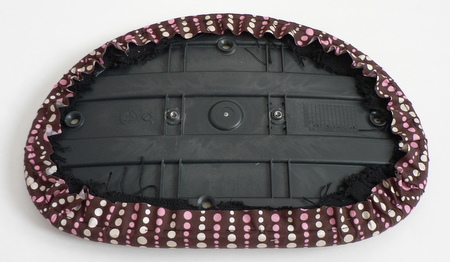
I reattached the plastic back to the back, and blanket stitched the original backing fabric to the seat, to hide the raw edges.
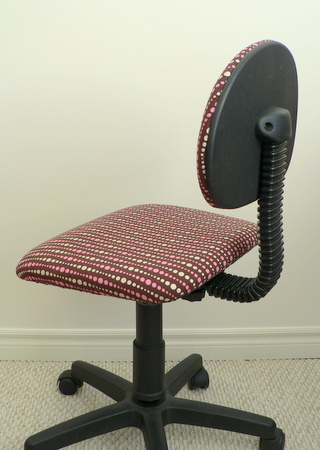
And the result? Better then new!
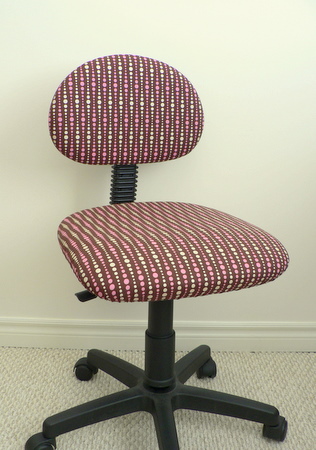
I love it!


Jodie R. said
I am so glad I found this post! I am a teacher and have two of these plain black office chairs that I keep in my office at school. I got laid off and won’t be working there anymore, and I had decided that I would just leave the chairs there. On second thought, they are coming home with me so I can recover them!
bem said
wow! i love pink in brown!
June said
Thanks everyone! As Val said above, the secret is really to keep the fabric stretched tight over the front as you sew around the back.
Robyn, if the existing cushions are removable you could make box cushions to fit them – it really depends on the style of the chair whether that would work. Without seeing a picture I can’t really give any more advice…
Miriam said
Fantastic redo there, I like the simplicity of the reupholstery idea there, instead of de-stapling and completely redoing.
val said
What a great job.
I don’t know about the other girl’s problems with a staple gun but I use mine all the time for board mounted window dressings and recovering dinig/kitchen chairs, etc.
I guess what I’m trying to say is that it isn’t hard and you can get good results, fast…..just keep your fabric tight!
Crystal said
Woah! You did a great job! Want to come to my house and re-do my furniture?? Or you could just send me yours.. ; )
Tina said
I have this same chair and have been meaning to give it a makeover. Thanks for the tutorial.
Donna said
I love the pattern on that fabric! Very nice! What better chair can there be but a customized one.
Blue said
That is pretty fantastic!
Jana said
Very nice! It goes perfectly with the throw.
Robyn said
I’m sorry it’s a rocking glider chair with matching rocking stool.
Robyn said
Wow that looks nice! I have a desk chair similiar to this one. I never thought of doing that. I do have a Rocker and rocking ottoman stool that need recovered. I can’t find a new cushion. Any ideas on how to recover one of those? I’m really not a sewer so I don’t know where to start. Any ideas would be helpful. Thanks!
Sally said
WOW! I want to find a chair I can do that to.