Joining Amigurumi
Looking for my amazing Amigurumi Seamless Join? If not, read on for basic amigurumi joining instructions:
When making amigurumi, you will often need to join an open-ended crocheted piece (e.g. the top of a leg or tail or a muzzle) to a closed crocheted piece (e.g. the body or head). Sewing these together neatly can be tricky and can make the difference between a cohesive finish and an untidy messy join. In this tutorial I will demonstrate the method I developed for sewing pieces together neatly, with an almost invisible join.
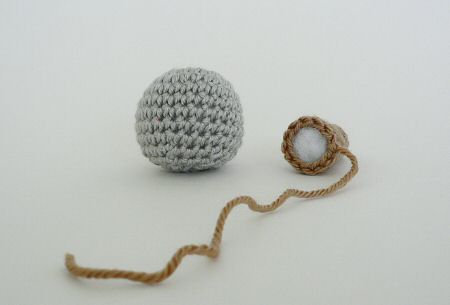
Both pieces are usually the same colour, but, for the purpose of this tutorial, I will be joining an open-ended brown piece (right) to a closed grey piece (left):
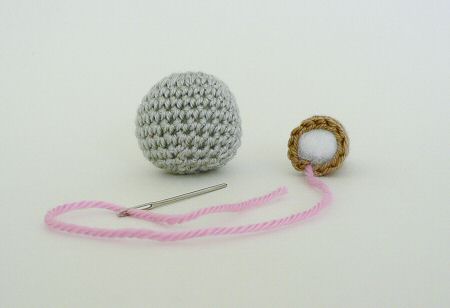
You will usually have a long yarn end left over from the open-ended piece to sew the two pieces together. For further clarity in the tutorial, I have substituted the brown yarn end (above) with pink yarn. Thread a yarn needle with the yarn end:
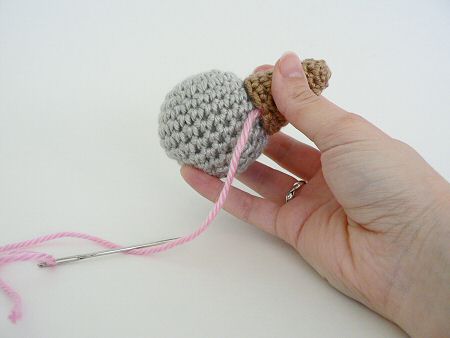
Hold the two pieces together in their final position, with the yarn end towards you. Note: I’m left-handed, so my stitches go from left to right and I hold my work with the open-ended piece on the right. If you’re right-handed, you will probably find it easier to mentally ‘flip’ all my images (left to right).
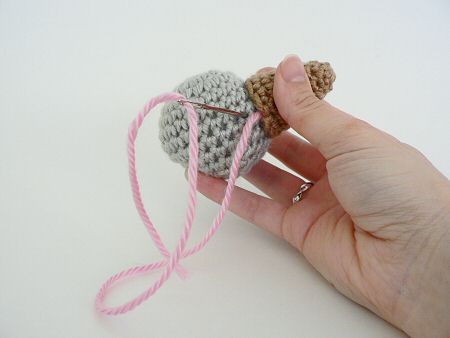
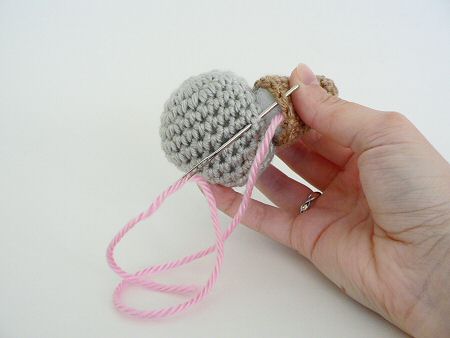
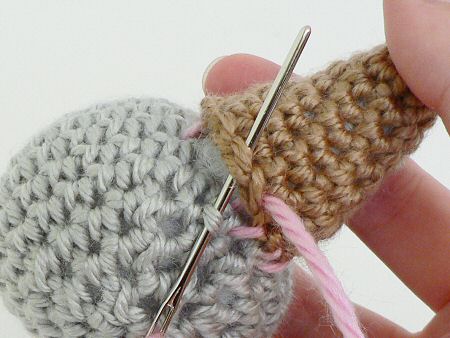
Begin the first stitch into the main piece, just outside the place where the two pieces touch:
Bring the needle back out of the main piece where it will be covered by the second piece, then through both loops of the next stitch of the open-ended piece (going from inside to outside):
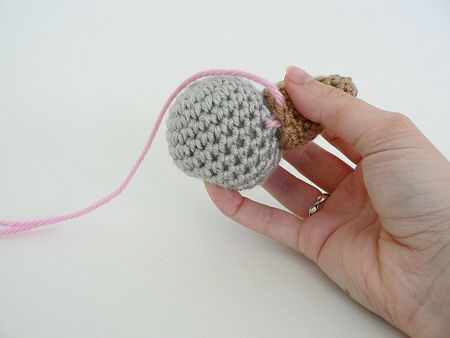
Draw the yarn all the way through so there is no slack, but do not pull it overly tight. Your first stitch is complete. If you are using the same colour yarn for both pieces and the sewing, the stitch will blend into the crocheted stitches and will not be obvious, unlike in this picture:
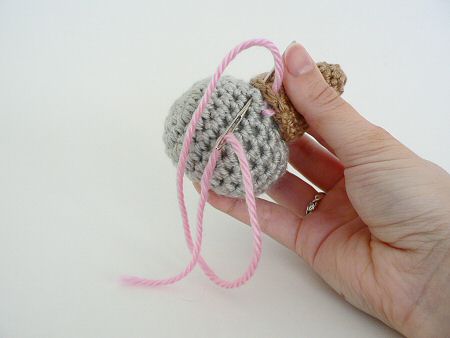
Repeat the same process with the next stitch: insert the needle into the main piece just outside where the two pieces meet, coming up further inside, then through both loops of the next stitch of the open-ended piece, going from inside to outside:
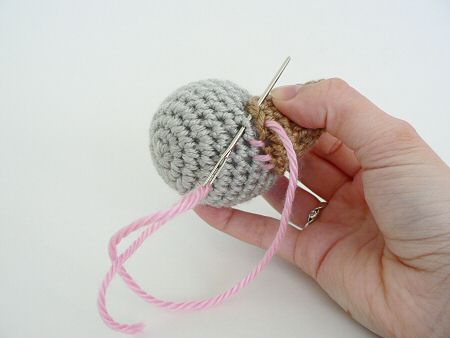
Repeat for each stitch around the open-ended piece. When you get the hang of it, you can do the complete stitch in one move:
Here’s a close-up of exactly where the stitch should be made:
And here is the finished result – a nice, smooth join:
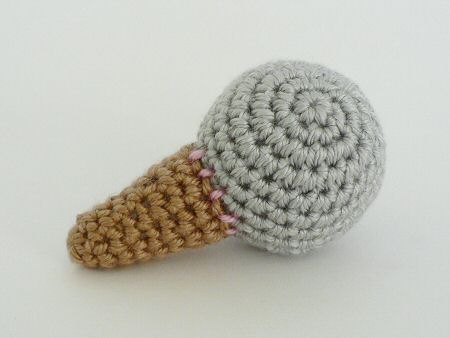
Look at the size of the stitches – to make the best join, the stitches should be visible like this, but of course they will not show up like this in your real work where you use one colour instead of three! Here’s an example of my technique in action:
I hope you find this tutorial useful! Happy amigurumi making…

Loved this tutorial? I have so many more amigurumi tips and tricks to share with you!
Boost your amigurumi skills with my latest book, The Essential Guide to Amigurumi, your comprehensive guide to amigurumi techniques and tips.
Do you find my tutorials helpful? If so, please consider making a contribution towards my time so I can continue to create clear and concise tutorials for you:
Thank you so much for your support! Now click below for loads more crochet video and photo tutorials (and do let me know what else you’d like me to cover in future tutorials…)


Ana Gloria Oña said
Hola muy buena explicación de los patrones, fáciles de entender y hacer el Amigurumi.
Tengo una duda en el muñeco Baymax, en el brazo en la vuelta 5 dice: popcorn 4pb, 17pb (18p).
Puedes explicarme con más detalle por favor.
Te agradezco tu tiempo.
Un abrazo,espero respuesta.
June said
Hi Ana, I’m afraid that’s not one of my patterns. There are lots of ways to make a popcorn stitch in different sizes, so the pattern should include an explanation for the type of popcorn stitch it uses. If the pattern doesn’t explain that, I recommend you contact the designer to ask them for assistance!
Trudy Biccum said
Do you have a tutorial for your Oscar The Grouch amigurumi crochet pattern? I seem to be stuck on attaching all fingers to make hand section. Any help would be appreciated. Thanks!
Trudy
June said
Trudy, I’m afraid I don’t have an Oscar the Grouch crochet pattern! A lot of other designers link to my tutorials in their patterns – I assume that’s what happened here. Please try to contact the designer directly if you have questions about their patterns 🙂
Sukita Morales said
your crafts are very beautiful . Thanks by share,
Beatriz Restrepo said
Gracias por tu asesoria. fue de gran ayuda
Susanlee said
So glad I found you! I too am a lefty and been improvising and creating successfully for over 40 yrs. it’s so nice to get a little extra help or confirmation from a fellow left hander!
Toby Jenkins said
I have finished all of the numerous pieces needed for an amigurumi dragon, but have been procrastinating putting it together because my joining work leaves a lot to be desired. Thank you for this information, I am making it my challenge for the week to complete this project!
Lynn said
Thanks so much for reassuring me that I am sewing my work together correctly, especially since I also am a lefty. there are quite a lot of out here. : )
Liana said
Thanks so much for taking the time to share your techniques with us. I just followed your tutorial and it worked out wonderfully!