How to Attach Crochet Appliques
Crocheted appliques are small flat embellishments that you can attach to larger crocheted pieces as decorative elements. There are different ways to tackle attaching an applique to a crocheted background, and the best method depends on what you’re making:
- Will the reverse side of the background be hidden – for example, on a cushion or a hat?
- Will the reverse side be visible – for example, on a blanket or a scarf?
- Or if you’re attaching the applique to an amigurumi – for example adding crocheted eyes or spots – is it a decorative piece, or will it be played with?
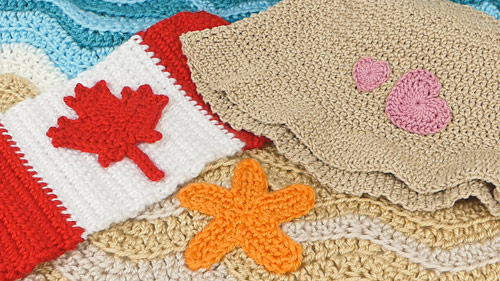
Left: glued applique; Right: stitched applique (faster method); Front: stitched applique (neater method)
In this video I’ll show you three different methods you can choose between, and the pros and cons of each.
Note: although there’s no actual crocheting in this video, I’ve made right- and left-handed versions anyway, so you can see the shape of the crochet stitches and the way to sew them down exactly as you’ll see them when you do it yourself!
Video Tutorial (right-handed)
Video Tutorial (left-handed)
Note: The videos may look a little small embedded in the blog: if so, you can fullscreen them or click through to YouTube (links: right-handed; left-handed) to watch them full-sized 🙂
Pattern Links
Wondering about the patterns you saw in this video? You can find them all here 🙂
Text Instructions: Basic Methods
I’ve covered pretty much everything in the rest of this post in the video, but if you prefer written instructions, here you go!
There are two main options for attaching a crocheted applique to a background. The simplest way is to glue it down with fabric glue. This is fast, and looks neat from both sides, but it’s less secure than sewing, so it’s best for decorative items. Or, you can stitch the applique down with a length of the same yarn you used to crochet it. Sewing is more secure, and I recommend two methods: the faster way, for when the back of the fabric won’t be seen, and a slower way that will also look good from the back of the fabric.
Before you start, flatten the applique by hand, or block it if you prefer, so it will lay flat. In all cases, the goal is to leave the applique looking the same before and after you attach it, as though you’ve just set it down on top of the surface you’re attaching it to.
Attaching Appliques with Glue
To attach your applique with glue, spread a thin layer of glue over the back of the applique, making sure to include every sticking-out point around the edge. Press the applique firmly onto the background so it makes good contact, and leave it to dry for 24 hours.
I recommend using washable fabric glue for this method. This is a white glue that dries flexible and clear. Once the glue has set, it’s permanent, and the piece can be washed.
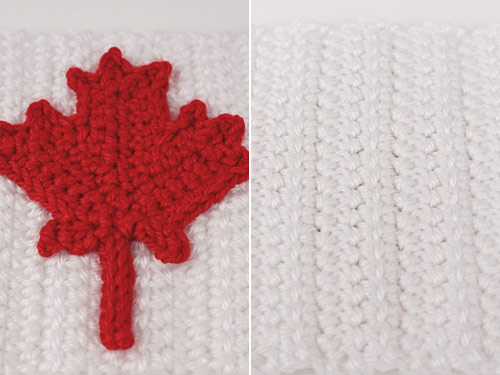
Left: The maple leaf has been glued to the crocheted flag. Right: The back of the flag looks neat.
Stitching Down Appliques (two ways)
When you stitch down an applique, the keys to getting a neat finish are to use the exact same yarn as you used to crochet the applique, and to keep your stitches inside the edge of the applique so the outline isn’t disrupted.
If you stitch with a standard whipstitch or overcast stitch, you’ll lose the appearance of the edge of the applique, and end up with a jagged edge. To give a clean result, we want to leave the sideways Vs all around the edge of the applique alone and stitch just inside the edge.
Bring your needle up at a gap between stitches, then pass it down again at the next gap between stitches. Repeat this process all the way around the applique, and you’ll end up with a row of running stitches inside the edge of the applique. The stitches look very neat and are barely visible as they’re worked in the same yarn.
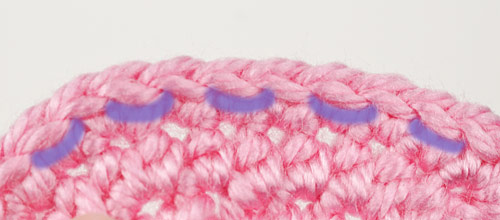
Worked in the same yarn, these purple stitches would be practically invisible.
That covers the front of the piece, but what about the back? You have two choices:
The Faster Method
If the back won’t be seen, you can pass your needle straight down through the background to the back of the piece and back up. Your stitches will be clearly visible from the back, so, although this method is fairly fast, it’s only useful if the back of the fabric won’t be on display, like the inside of a hat or sweater, or if you’re appliqueing onto an amigurumi.

Left: The hearts are stitched to the hat. Right: The stitches show on the inside of the hat.
The Neater Method
If people will see the back of the fabric, like on a blanket, you can avoid this messy look by stitching more carefully. Instead of passing your needle right through the background fabric, make small stitches into the background, so each stitch passes through only the surface loops of the background stitches. This method is slow, but the stitches will be almost invisible from the back.
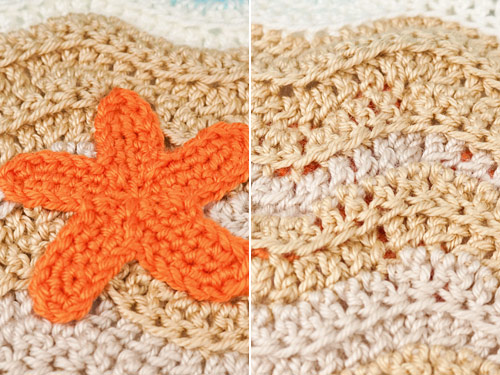
Left: The starfish is stitched to the blanket. Right: The stitches barely show on the back of the blanket.
Finishing
With either sewing method, when you’ve finished, all the edges of the applique will be tacked down securely so the applique can’t move.
Fasten off securely, keeping the knot beneath the edge of the applique, then weave in the yarn end by passing it through the stitches on the back of your applique, so the end is trapped between the applique and the background.

Loved this tutorial? I have so many more amigurumi tips and tricks to share with you!
Boost your amigurumi skills with my latest book, The Essential Guide to Amigurumi, your comprehensive guide to amigurumi techniques and tips.
Do you find my tutorials helpful? If so, please consider making a contribution towards my time so I can continue to create clear and concise tutorials for you:
Thank you so much for your support! Now click below for loads more crochet video and photo tutorials (and do let me know what else you’d like me to cover in future tutorials…)


Tamra M Nofsinger said
I have been needing to know ways to do this. I’ve checked out a few sites on how to do this and the ways available to do this and they were never helpful or fully understandable. I came across your site here and it is the best, most greatly understandable, one I have found! You even got pics on all the ways! I love your article! Thank you for the help!!