PlanetJune by June Gilbank: Blog
PlanetJune Craft Blog
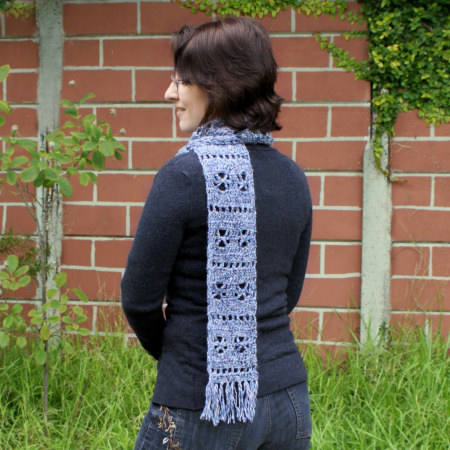
Latest news and updates from JuneFrosty Windows Scarf
Frosty Windows Scarf is part of the PlanetJune Accessories range of crochet patterns by June Gilbank.
This pattern is Donationware – the pattern is available for free, but if you like it please consider sending me a donation to show your appreciation:

Send me a donation and receive the easy-to-print PDF version of the pattern as a thank you! It includes some additional info that you’ll only find in the PDF version:
– Step by step photo tutorial for the ‘tr2tog over next 5 st’
– How to calculate how much fringe you’ll need
– Step by step photos for making and attaching the fringe
Donations of any size are much appreciated. Just add the amount you wish to donate, and, once you have checked out and paid, your pattern will instantly be available to download from your PlanetJune account.
The complete pattern and instructions are available below, regardless of whether or not you choose to pay for them 🙂
This is a PlanetJune original crochet pattern. Feel free to use items made from this pattern however you wish, but I’d appreciate credit as the pattern designer. Please do not reproduce the pattern anywhere else; instead post a link to www.planetjune.com/frostywindows
Not ready to make it yet? Add it to your Ravelry queue: 
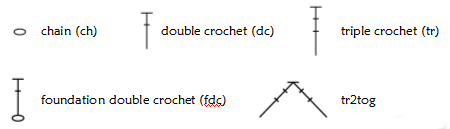
Terminology
| ch | chain |
| ch-sp | chain space |
| dc | double crochet |
| fdc | foundation double crochet (foundation treble crochet for UK/Aus) |
| st | stitch |
| tr | triple (treble) crochet (double treble crochet for UK/Aus) |
| tr2tog | triple crochet decrease (double treble crochet decrease for UK/Aus) |
You will need…
- Yarn of your choice (#3 DK or heavier recommended) and an appropriate hook (see the yarn’s ball band as a starting point for the hook size, but you may wish to go up a size or two – see Gauge, below)
Sample scarf used DK weight (#3 light) yarn (190m/210yd Wendy Skye) and an I US/5.5mm hook - Yarn needle to weave in ends (if omitting fringe)
- Scissors
Measurements
Finished sample scarf measures 53″ x 4.75″ (135cm x 12cm) unblocked; 59″ x 5″ (150cm x 13cm) blocked, excluding fringe.
Gauge
Gauge is not important for this pattern – I suggest you use the hook size recommended on the ball band of your yarn as a starting point, or go up a size or two until your fabric isn’t too stiff and drapes nicely.
Resizing the pattern
Width: This pattern is written with a width of 2 pattern repeats. If desired, you can increase the width by adding 8 chains to the starting chain for each additional pattern repeat.
Length: The exact length of the scarf isn’t critical – you can just keep adding repeats until the scarf is the length you like, and then work the top edging.
See also the accompanying stitch diagram to make the pattern and repeats easier to follow.
Special stitches
Foundation double crochet (fdc). This technique creates both the foundation chain and a row of double crochet stitches in one row. It makes a stretchy foundation, and is far easier to work into than a chain.
- First fdc stitch: ch 3 (does not count as a stitch), yarn over, insert hook into third chain from hook and draw up a loop, yarn over and draw through one loop on hook (this forms the chain), [yarn over and draw through 2 loops on hook] twice (this forms the double crochet). (1 fdc completed)
- Each subsequent fdc stitch is worked under the 2 loops that form the chain at the bottom of the previous stitch. Yarn over, insert hook under both loops of the chain, draw up a loop, yarn over and draw through one loop on hook (this forms the chain), [yarn over and draw through 2 loops on hook] twice (this forms the double crochet).
tr2tog over next 5 st : * yarn over twice, insert hook into next st and draw up a loop, (yarn over and draw through 2 loops) twice ** [first leg complete, 2 loops remaining on hook], skip next 3 st, repeat from * to ** [second leg complete, 3 loops remaining on hook], yarn over and draw through all 3 loops on hook.
Pattern
Please note this looks much clearer in the PDF version! Why not donate a dollar (or more) and you’ll get the nicely formatted printable version?
Notes:
- Please also see the accompanying charted stitch diagram.
- The standard way to begin a new row of double crochet stitches is with ch 3. However, I find that ch 2 gives a less visible result. If you chain loosely like me, and your ch 3 is taller than your dc stitches, you may substitute ch 2 for the ch 3 at the start of each row of the scarf, to make the edges of the scarf look neater.
- For convenience, if you prefer, you may work the final stitch of each row into the gap between the previous stitch and the turning chain instead of working into the top of the turning chain.
Fdc 19 (or ch 21, dc in 4th chain from hook and in each remaining chain). (19 st).
Row 1: ch 4 (counts as dc + ch 1), turn, skip next st, dc in next st, * ch 1, skip next st, dc in next st; repeat from * across.
Row 2: ch 3 (counts as dc, here and throughout), turn, * dc in next ch-sp, dc in next st; repeat from * across.
Row 3: ch 3, turn, dc in each st across.
Row 4: ch 3, turn, dc in next 2 st, * ch 2, tr2tog over next 5 st (work first leg in next st, skip next 3 st, work second leg in next st), ch 2, dc in next 3 st; repeat from * across.
Row 5: ch 3, turn, dc in next 2 st, * skip next ch-sp, (tr, ch 3, tr) between legs of tr2tog, skip next ch-sp, dc in next 3 st; repeat from * across.
Row 6: ch 3, turn, dc in next 2 st, * dc in next st, 3 dc in next ch-sp, dc in next 4 st; repeat from * across.
Row 7: ch 3, turn, dc in each st across.
Repeat Rows 1-7 as many times as desired. (Sample scarf has a total of 14 repeats.)
Rows 8-9: Repeat Rows 1-2.
Fasten off, leaving a 6″ yarn end. Block if desired. Continue to Fringe (optional) instructions, or weave in yarn ends.
Stitch Diagram
This stitch diagram shows the complete width of the scarf, the foundation row, one pattern row repeat (Rows 1-7), and the top end of the scarf (Rows 8-9).
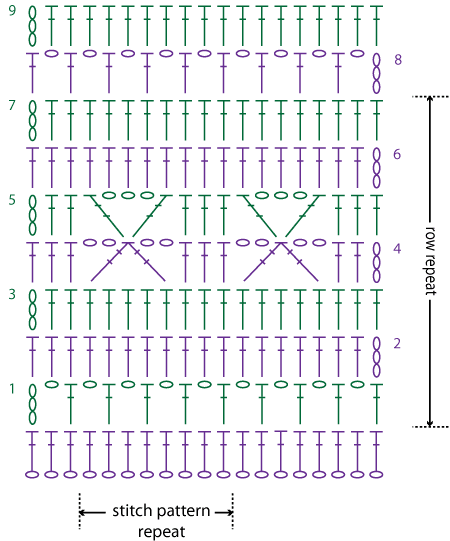
Key
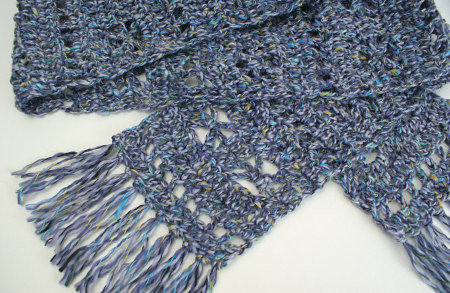
Fringe (optional)
Decide how much fringe you’d like. For my sample scarf, I used 2 strands of yarn held together for each knot, and knotted the fringe into every other stitch across the short ends of the scarf (a total of 40 strands of yarn). For a fuller fringe, use more strands of yarn per knot, or knot the fringe into every stitch across the ends.
To easily make all your fringe yarn strands the same length, wrap the yarn around a piece of card and cut all the strands across the bottom. I used a 3.5″ (9cm) tall card to give 3″ (7.5cm) long fringe.
For each knot, hold 2 strands together and fold them in half. Insert the crochet hook through the scarf edge and hook the midpoint of the folded yarn strands. Draw the yarn loop back through the scarf edge and enlarge it until you can reach through the loop with your thumb and forefinger. Grab all the yarn ends and pull them through the loop, then pull to tighten the knot.
Tip: To save weaving in the yarn ends from the scarf, pull each end through the nearest fringe knot as you form it, then trim the ends to match the length of the fringe strands.
I hope you enjoy this pattern. Please leave me a comment below if you do, and consider leaving me a donation. Thanks!
2 Comments »
Leave a Reply
Quick Links: Crochet

Quick Links: Crafts


Welcome to PlanetJune!
Hi, I'm June. Welcome to my world of nature-inspired crochet and crafting. I hope you enjoy your visit!
If you'd like to get in touch, you can contact me here.


Beatrice Hartz said
Very good site. Thank you so much. Cari
kelios said
I just finished my first scarf using Michael’s Loops and Threads Charisma. It’s a bulky weight yarn but works perfectly for a single pattern repeat. One skein makes a 6×45 inch scarf, which is exactly what the charity I’m working with asked for. It worked up so quickly, and makes a nice change from basic single and double stitch. Thanks so much for sharing the pattern!