light tent for better product photography
One of the biggest frustrations with craft blogging can be to take decent photographs, as photography is so light-dependent. Using the camera flash is too harsh, and using your interior room lighting will give you dimly-lit, orange-tinted photos. The best solution is good natural light (out of direct sunlight, otherwise you will see dark shadows behind your object), but if you’re in the middle of one of those weeks where the sun never shows its face, what can you do?
The professional solution is to use a light tent (aka light box) for product photography. They are available to purchase commercially, but cost hundreds of dollars. If you google ‘light box’ or ‘light tent’ you will find people who have made their own light tents, including Bill Huber’s popular tutorial at PBase, made from PVC plumbing parts and a white bedsheet! In the comments following his tutorial, I noticed that someone had bought an IKEA Antonius laundry bag stand to save them from building their own frame for the light box, and woohoo, the frame is still available and only costs $7!
If you’d like to make your own light tent, the simplest form I have seen only requires a large cardboard box and some fabric, so don’t be put off by the idea of making a frame or finding a convenient IKEA!
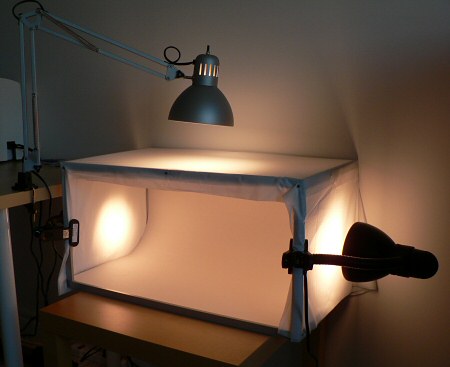
Here is my prototype; I just draped the frame with a $1 white plastic tablecloth, and it works! I have attached a clamp lamp to each side of the frame so that the lights shine through the fabric and into the tent. I also used a desk lamp to add additional lighting through the top of the tent.
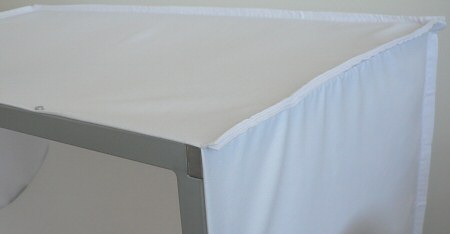
I was a bit worried that the plastic might melt under the lights, and the draped tablecloth didn’t look very tidy, so I bought some cheap white fabric, sewed 4 panels (two sides, a back and the top), and then sewed them together to form a fitted cover. I purposely left the final seams on the outside to leave a snug fit around the corners of the frame. You can also probably see a little silver blob on the left of this photo – I had some rare earth magnets lying around, so I used a few to keep the front edge of the fabric stretched out nicely over the metal frame:
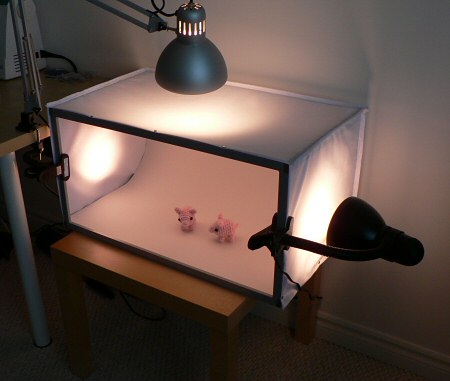
I used a white bristol board inside the light tent to give a seamless backdrop, but of course I can easily swap in another backdrop to add more colour. And here’s the finished tent:
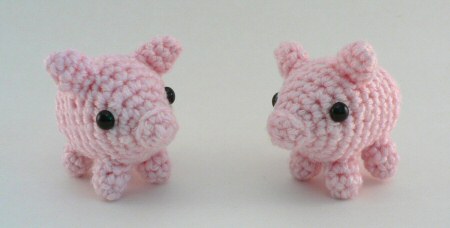
Now for a photo comparison. Firstly, some piggies in nice natural lighting. This is about as good as it gets under normal conditions. Looks pretty good; there is a little shadow in the middle between the pigs, but the picture is fine, really:
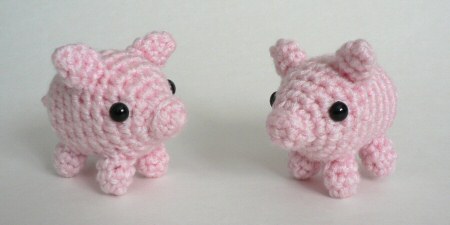
And now for the light box photo:
Huh? There’s not really any difference, you say? That’s the whole point… because I could take the exact same picture in the middle of a thunderstorm, or in the middle of the night! No sunlight required. And that is the beauty of the light tent.
A few notes:
- You can use any directional lamps for a light tent, but make sure you use the same light bulbs in each light source, otherwise your colour balance will change across the photo
- Unless you have very special bulbs (mine are GE Reveal – they are supposed to be natural daylight coloured, but for the purpose of photography they are nowhere near!), you will have to set the white balance on your camera if you have that option, or adjust the colour balance of your photos in your image editing software. But it’s a 1-click fix in most software, so it’s really not a big deal.
- You can easily adjust the amount of lighting coming from each direction by moving each lamp closer to, or further away from, the light tent. I find that using the side lights brightly and the top light a little further away works nicely.
UPDATED 18/11/09: I have since added a fourth light, pointing into the front of the box. It’s not filtered by the tent, so I keep it further away (behind the camera). As zabacorporation mentioned in the comments, my example pig picture would have been better with a light source illuminating them from the direction the camera sees (i.e. the front). The light tent then serves to reduce the shadows caused by that direct light. I’m still tweaking the exact configuration!


mohammad alipour shahir said
Hi, I appreciate the many nice details
Davetiye said
Thats a very good idea. I am really glad to read this post. It solved all my needs . thanks
davetiye said
thank you wery much
Dima said
TIP: next thing you need is inexpensive postprocessing and better when it’s free. Here is one: 2dbin.com
Heather - Dollar Store Crafts said
Thanks for linking your post at the CROQzine light box-along! You’ve managed to demystify the process even further!
Han Cheng said
Thanks for sharing how to make a fantastic light tent!
Jami said
Thanks June!!
That definitely makes sense.
I am off to Ikea then!
As for your light box, out of all the homemade ones I have come across online, yours is simply the best one in my mind! Well done!
And I love your work too!
ta!
Jami said
Dear June:
Fab post – I am currently researching which light box diy project is best suited for me.
One thing I wanted to double check with you please….did you use the Antonius frame in the end. It kindof looks like it to me, but I couldn’t see the horizontal metal grooved bars that are typically afixed to the antonius structure for holding the sliding buckets. If those bars are there, I can only see them casting a shadow on the items below if a light was shining from above.
Thanks to confirm what frame you used. I have 3 Antonius frames at home and would love to use one for this!
Ta!
June said
Jami: yes, I did use the Antonius – the confusion arises because IKEA now have a whole range of products called Antonius! I think you’re thinking of the Antonius frame, which does have the horizonal bars, and yes, I agree that those would get in the way! I bought the Antonius stand for laundry bag, which does not have those bars. So I don’t think the frames you already have would work – you’d have to remove those horizonal bars (if they are removable?) or buy the laundry bag frame instead. Hope that helps!
Gifts said
Very nice idea. It is a good inspiration for those who want to specialize in product photography especially craft products. Thanks for sharing this low cost solution.
Craftzilla said
I bought a lightbox set from Amazon for $50 and it’s been a great investment! It came with a fold up box, the lights and a little tripod for the camera. So if you don’t have time, there are some affordable options out there.
Vickiecan1 said
Wow, I am so excited about making one. What a fabulous idea.
Crafts by Alice said
Great photo box. I have tried several times to take pictures in my makeshift one and they all come out with shadows. I see yours is in a totally dark room. I think that might be my problem. I’ll have to give it another try!
futuregirl said
Awesome! I’ve set up a photo shoot before, but never anything that could be permanent. I’m so jealous! You are totally rockin’ it, June.
zabacorporation said
The light tent looks great. I just have a tip for you. In my opinion the photos from the tent would look better if you placed the upper source of the light not above the object but slightly in front of it. Try and write me here:)