PlanetJune Craft Blog

Latest news and updates from June

Archive for August, 2006

laptop sleeve

I’ve just finished making the sleeve for my new laptop. I wanted a small slim sleeve to protect the laptop while it’s in another bag, so I intentionally didn’t include a handle or strap.

I made the sleeve out of heavy cotton fabric (actually leftover fabric from curtains that I shortened for a friend). I made a quilted lining out of a soft stretch knit fabric and batting. And yes, the stretch fabric was a mistake – I only picked it because of the colour, and it was so stretchy that it was very difficult to work with. I had to iron fusible interfacing onto the flap lining to make it stable enough to work with. 

I used velcro to close the bag, and sewed a ribbon trim on the flap in a colour to match the lining. I had ideas for more embellishments, but I like it being clean and simple.

laptop sleeve and lining before stitching together
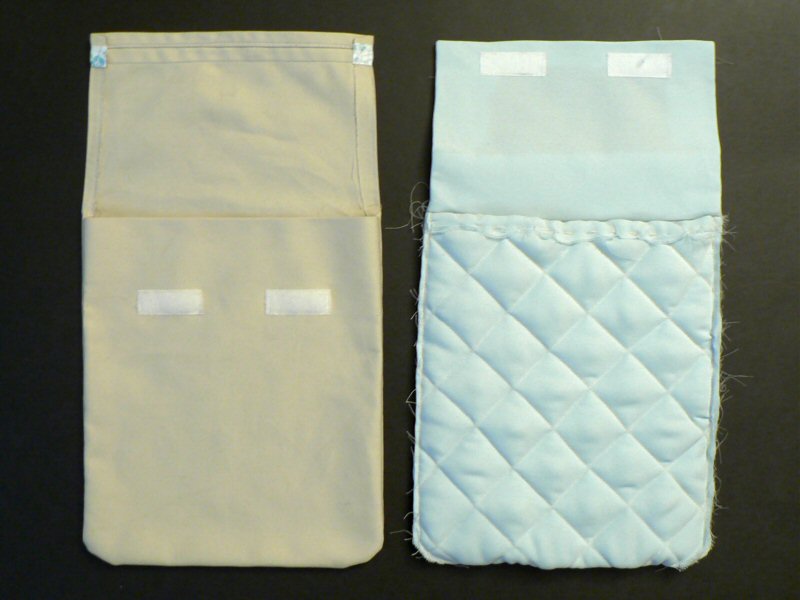
The outer sleeve and lining before I stitched them together. See my lovely quilting on the lining?


The finished sleeve, closed…


…and open. The laptop fits perfectly inside with no room to spare.


There’s the quilted lining again.


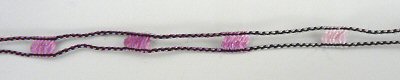
Ribbon detail from the flap. So pretty!

Comments (3)

telescope shroud

Ugh, I hate the word shroud! Not sure what else to call this though.

Dave’s telescope is designed to be collapsible, so it doesn’t have a solid tube; it just has 3 poles connecting the top and bottom of the telescope.

He asked me to make a removable fabric tube to keep light out of the telescope. It was complicated to design as the scope has bits sticking out  – I kept going back to the scope for ‘fittings’ as I started each part.


I made this out of two layers of ripstop nylon, so that no light can get in. The top stays up with elastic loops that pass over the top ring of the scope and fasten around buttons on the shroud. There are 2 slits (reinforced with bias tape) near the top for access to the eyepiece and filter wheel. I left the side seams open at the bottom for the pole supports, and the shroud closes below the supports with velcro. 

The shroud can open out flat, and it attaches around the body of the telescope using two zips; one zips up from the bottom of the telescope, and one zips down from the top, so there is room for the finder scope to move up and down vertically by partially unzipping one of the zips.

Lots of work, but it looks pretty good, and, more importantly, it does what it’s supposed to do – keeps stray light out of the telescope.

Comments (2)

laptop keyboard cover

I bought a laptop this weekend, so now my mind is in overdrive thinking of accessories I can craft for it. Firstly, I saw that Tom Bihn sell a laptop keyboard cover to protect the screen from picking up dirt from the keyboard when the laptop is closed. Here’s my version:

laptop keyboard cover 

Maui approves, and my keyboard is protected from excess cat fur!

I made the cover from moleskin fabric so it’s really soft. Very quick and easy to run up on the sewing machine, and now my screen is safe.

One down… next up, a laptop sleeve so I can stick the laptop in a backpack without it getting scratched. Stay tuned…

Comments

wip: lightweight scarf

Walmart and Michaels are both having excellent clearance sales on yarn this week. I picked up this lot for $10!

I’m not sure what I’m going to do with it all yet – I’m thinking some kind of crochet amigurumi soft toys for the brown fluffy yarn. I’ve started making a scarf with the purple Bernat Matrix yarn:

I was hoping that I could crochet this scarf in no time, but I find the yarn difficult to work with. My crochet hook keeps slipping in between the top and bottom edges of the yarn, as it’s mostly empty space between the blocks of colour.

I’m getting the hang of it now, but it’s still slow going. The colour is pretty, though, and the texture of the scarf is interesting. I think I’ll wear this when it gets a bit cooler, maybe with a denim jacket.

Comments

polymer clay berry pins

My cubicle at work needs some personality, so I made these berry pins to brighten things up. They are made from FIMO polymer clay, although I did cheat a bit by using a mould. I embedded long pins in the back before baking, and then varnished them with Varathane.

Strawberries, blackberries, raspberries… yum!

polymer clay berry pins - strawberries, blackberries, raspberries 

Comments (3)

wrist pincushion

All the pinning I did when I was converting my skirt into a dress for the whiplash competition made me realise that I could really do with a pincushion, and preferably one that I can easily take to the mirror to make adjustments while I’m wearing something. I made this pincushion last night to (hopefully) prevent more pins from falling onto the floor and getting lost. With the pincushion on my wrist, my pins will always be at hand when I need them.

The pincushion body is made from two identical squares of cotton with a cute pig print. I offset the squares by half their width, so the midpoint of a side on one square lined up with a corner of the other square, and then sewed the squares together. It was a little fiddly but I ended up with this interesting shape – octagonal if viewed from the top – with the seam zig-zagging around the sides of the cushion. I don’t know if this is a common design or not; I made it up but I’m sure it must have been done before.

I stuffed it with fiberfill and used a yellow glass bead in the centre – I didn’t want to use a button as it would have obscured the pig’s head. I made the wrist strap from some 20mm twill tape with white velcro to fasten the ends.


Comments

refashion: skirt to dress

The August whiplash challenge is called ‘wardrobe surgery’ and involves refashioning an exisiting piece of clothing by deconstruction/reconstruction or embellishment/decoration.

I looked through my old clothes and found this long skirt that I used to love in the mid ’90s, but now it’s hopelessly high-waisted and really doesn’t do anything for my body type:

Yuck! I hope it didn’t always look this bad on me! It’s so unflattering…

Here it is laid out on the floor (inside out) so you can see the shape of it: 

How did I turn this into the cute strapless dress shown below?

First I took in the side seams between the original waistband and the new hip area. I added two vertical darts at the front between the bust and waist to fit the bodice more closely, and then added two more vertical darts at the back from the shoulder blades to just below the waist, to fit the curve of my back.

I turned the old elasticated waistband inside the dress (which helps to keep it from falling down – always a risk with a strapless top), and took the bottom of the dress up by 12cm to bring it up to knee length. I used the excess fabric cut from the bottom of the dress to make straps, but the dress looked better without, so I removed them again. I was also considering making a fabric flower to accessorise, but I think the dress looks classy the way it is, so I’m going to keep it simple.

I love the fit of this dress! I can never buy dresses because of my pear-shaped figure, but this does exactly what a dress should do – fits around my top half, and floats over the areas I don’t want to emphasise. It took a lot of pinning and re-pinning (and in some cases unpicking seams and trying again) before I got the dress to fit like this, but it was worth it!

I’m entering this into the deconstruct/reconstruct category on whiplash.

Comments (15)

beaded memory wire rings

I whipped these up last night by threading size 15 seed beads (colour: heather mix) onto memory wire rings. I superglued the first and last bead onto the wire and that’s it! Memory wire is great – the resulting rings are adjustable to any size finger.

Comments (8)

« Previous entries
  • Quick Links: Crochet

    navigation: arrow

    buy crochet patterns and accessories from my online store

    'Everyday Crochet' and 'The Essential Guide to Amigurumi' crochet books by June Gilbank

    Crochet video tutorials and step-by-step photo tutorials

    Free PlanetJune crochet patterns

    Frequently Asked Questions

    Quick Links: Crafts

    navigation: arrow

    Punchneedle Embroidery information, ebook & patterns

    Papercraft ebook & tutorials

    Free PlanetJune craft projects & tutorials

  • Blog Post Categories

  • Blog Archives

  • Welcome to PlanetJune!

    June Gilbank

    Hi, I'm June. Welcome to my world of nature-inspired crochet and crafting. I hope you enjoy your visit!

    If you'd like to get in touch, you can contact me here.
    crocheted Canadian flag by PlanetJune
  • A fanned-out pile of the books Everyday Crochet and The Essential Guide to Amigurumi, with text 'The answers to all your crochet questions at your fingertips - find out more'
  • Support PlanetJune!

    Want to say thanks? You can send me money in seconds at paypal.me/planetjune (over $20) or paypal.me/planetjune2 (under $20) or send me a donation through my shop.

    Or simply click through from my links before you shop at Amazon, Etsy, KnitPicks, LoveCrafts or Crochet.com, and I'll make a small commission on your purchase, at no cost to you! Start here:

    ♥ Support PlanetJune ♥

    Tip: This link is also in the footer of every page!

    Thank you so much for your support!